In the United States, the Native American Graves Protection and Repatriation Act of 1990 ([slider title=”NAGPRA“]Many groups, especially indigenous peoples, have profound concerns about the ethical and respectful treatment of the dead by archaeologists, physical anthropologists and museums. The issue is complicated with concerns ranging from academic freedom to the rights of the dead. There is a continuum of opinion about these matters.[/slider]) mandates special care and treatment of Native American cultural remains, particularly human remains. The single best discussion on the internet that includes the most sources of clickable information that I’ve found on NAGPRA is on Larry J. Zimmerman’s site ((Repatriation and Burial Issues – found on the internet 4/10/09. This is a page on Larry J. Zimmerman’s site, which gives an overview of NAGPRA and the issues that surround it. His case studies are mandatory reading for anyone interested in participating in any level of archaeological practice)). I highly recommend it.
Because there is an expectation (usually) that Native American remains are reburied or returned to their tribes, it isn’t hard to imagine that archaeologists are on the clock from the moment they discover the remains to gather as much data as possible. Eventually the bones will be out of their hands and any opportunity to get a re-look or use them for teaching purposes will be lost.
But there is a way to capture very accurate representations of interesting bones for later analysis or teaching: make detailed cast of the artifact! If you’ve ever been to the dentist to have a crown made, you’ve been the subject of this method yourself. What the dentist did was apply a non-toxic, non-damaging alginate to your tooth to create a mold in which a new, porcelain copy could be made.
To do this with a bone or even a lithic artifact, you’ll need to gather a few, relatively inexpensive materials:
- Dental alginate (about $10)
- Casting stone (about $30-45)
- bowl (free? check your cabinet)
- non-stick rubber spatula for mixing
- vibrator (not that kind!)
The process is pretty straight forward, but I can see where some practice could be important.
1. Put alginate powder in the mixing bowl and begin mixing a bit of water a little at a time. The idea is to bring the mix to about the consistency of cake batter. Use the spatula to mix and work the flat edge against the side of the bowl for a couple of minutes, adding water/alginate until you get the right amount/consistency. Keep in mind it sets quick, so don’t dilly-dally.
2. Pour and scrape the alginate into a vessel that will accommodate the object you’re casting (in the cast I show below, I used a disposable, Styrofoam bowl which I trimmed with scissors). Don’t use paper vessels. Use something like Styrofoam or non-stick or you will end up with bits of paper stuck to the cast. Non-stick reusable bowls are good for the environmental-conscious but Styrofoam lets you change the size shape with a knife or scissors.
3. Stick the surface you want a cast of into the alginate, being mindful that you’ll need to remove it. If, for instance, you want to cast a vertebra, you’ll want to do it one plane at a time, otherwise you might damage the mold when you remove it. Also, if there are any areas where the alginate can get behind and “catch” when you remove it (lamellae, osteophytes, etc.), you want to try to position your bone accordingly.
4. Give your alginate time to set. For this, read the label on the particular alginate you purchase. Some will set in under a minute (you have to work very quickly!), some in just a couple of minutes. If you’re casting a lot of samples, you might want the quick-set. Otherwise, I’d recommend the type that take a minute or two. Even if you have to manually hold a bone or lithic in place, this isn’t a terribly long time to wait.
5. Once your alginate is set, work the artifact out of the newly created mold. Rock it back and forth, pull, etc. until it pops from the mold. You should see a very detailed and reversed impression of your artifact.
6. Assuming you’ve cleaned your bowl of the remaining alginate (it cleans quite easily), now you’ll want to mix the stone. Same concept: add what looks like enough stone to fill the mold in the bowl, add water a little at a time, mixing to get the cake-batter consistency. Again, you can add additional water/stone until you get the consistency/amount you need as long as you’re working quick (this, too, sets fairly quickly).
7. Set your mold in its Styrofoam bowl or cup (or whatever) on the vibrator’s platform, turn it on (hold the mold so it won’t slide off) and slowly drip stone into the mold using the spatula. The reason the vibrator is important (and don’t bother doing this unless you have one or are using the more expensive type of stone which doesn’t require vibration) is trapped air in the mix needs to be bubbled to the surface, otherwise the result will be a brittle, crumbly mess. Scoop some stone on the spatula and just let the edge of the spatula touch the edge of the container. What happens next is what geologists call liquifaction: the stone becomes more fluid due to the vibrations and more easily sorts and settles in the mold without trapping air. Air that does get trapped bubbles to the surface rather quickly.
8. Once the mold is filled, and you see no additional bubbles (just a few seconds), go ahead and shut the vibrator off. You can add some extra stone to the top of the container with the alginate mold, so that you can create a nice, flat surface. Just gloop on a few more spatulas of stone mix (no need to vibrate it at this point) and invert a Styrofoam plate on top. Holding it all together, flip it over and let it dry for 1-3 hours. You might want to use a spatula to scrape away an excess that sticks out between the container and the plate. While the stone sets, it’ll feel noticebly warm since there’s a slight exothermic reaction as it sets. Once set, peel away the Styrofoam and gently work the cast away from the flexible dental alginate.
If you’re very lucky, the alginate mold will fare very well and you can, perhaps, get another cast or two out of it. Alginate doesn’t hold together well over time and it’ll loose its shape and form.
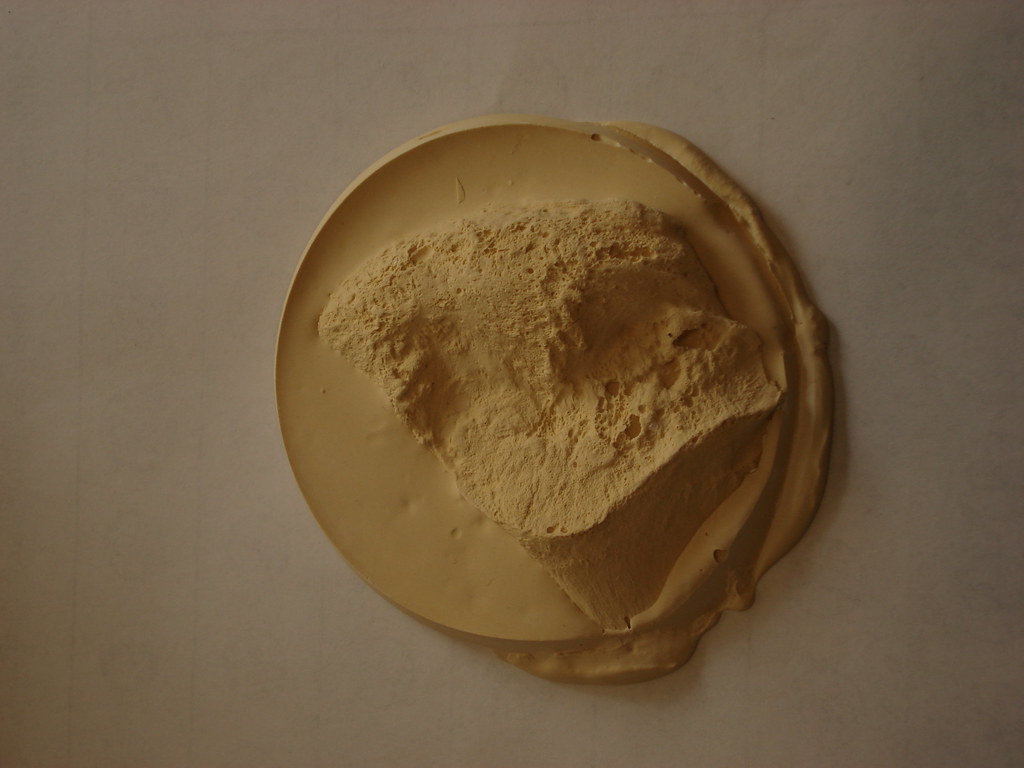
Below are two photos of the bone and cast I made. Its of the auricular surface of the right ox cocae of an adult male with Paget’s disease apparent in the skeletal pathology. I cast this particular auricular surface because it was so obviously not consistent with the subject’s age whereas the left auricular surface and both the pubic symphyses were consistent with a male over 45.


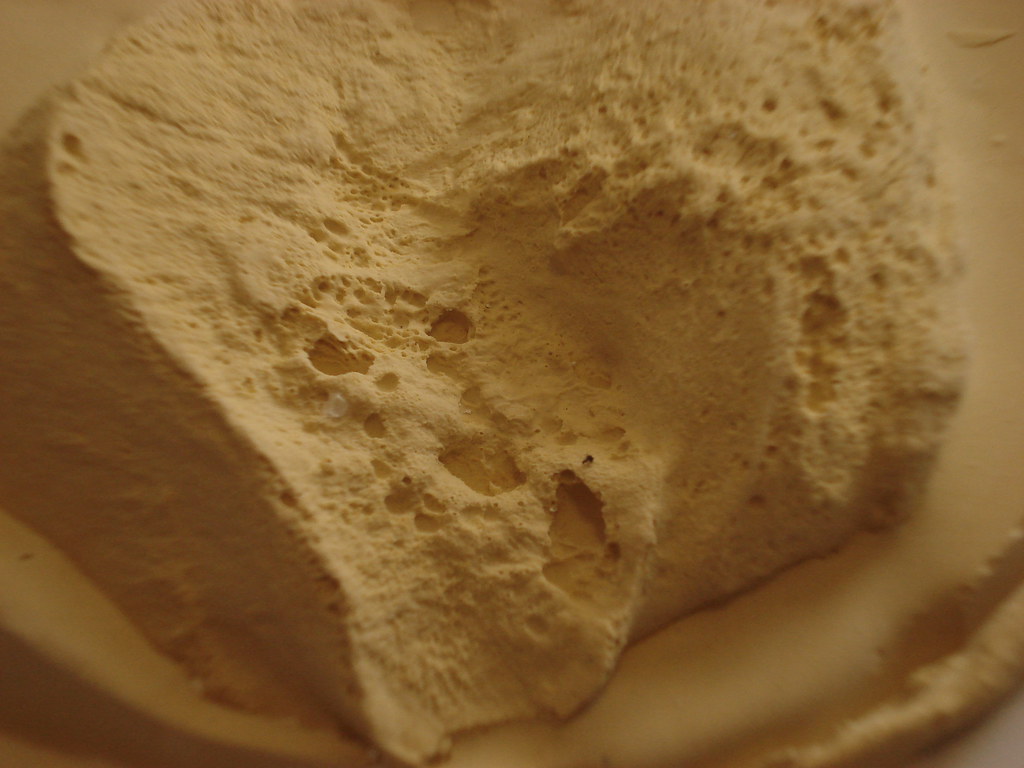
There are many different casting materials other than alginates (which are derived from seaweed and its the sodium alginate NaC6H7O6 which quickly absorbs water which is used). But the level of detail is so good in a cast that it’s almost as good as the real thing. I’m told that scanning electron microscopy can be employed to examine for tool marks, evaluate striations to determine if breaks in bone is ante-, pre-, or post-mortem, etc. Below is a close up of the cast I made so you can see the details.

To obtain the materials needed, check your local area for a dental supply store. Dentists are everywhere and they need the stuff! A Google search for “dental supply” came up with a lot of hits and Darby Dental Supply, LLC was among them. I noticed everything listed above on their site, so you can get an idea on prices, etc.
This was just my brief and rudimentary personal introduction to casting. I expect I’ve a lot to learn and look forward to doing more. For those more experienced at this than I (and if you’ve done just two casts that includes you!), please feel free to correct or add to anything above. Or post links to pics of your own casts. I’d love to read more on this and hear other tips, tricks, and methods.
![Reblog this post [with Zemanta]](http://img.zemanta.com/reblog_a.png?x-id=47b221df-3f3f-473e-9aaa-170ced9bd3cd)
I found a very old portion of a buffalo skull this past weekend. going to try to make a mold to make future, for art class. where do I get the vibrator( not that kind)
Colleen
Sorry to not reply for so long.. its been a busy few last weeks. I would recommend looking for dental suppliers in your area. They sell the platforms with vibrating bases just for this sort of use.
But, in a pinch, I suppose the other kind might work if you’re willing to take the time and move it around the bowl. Being battery powered, one of these “other kind” might be good for the field. It might be difficult to explain to co-workers or your crew chief…
Hey!
I wanted to know if this same method can be used to make casts of animal bones as well: someone I know has just found a deer skull, complete with antlers, and I wanted to to make a cast of it for a future project.